Appearance
FAC-PAT-01 · Set up the waiting-room display and patient kiosk
The facility administrator gives the lobby display and patient kiosk separate, limited accounts. Patients enter their name and date of birth at the kiosk; reception can help if the details do not match. The waiting-room screen refreshes queue numbers and never shows patient names.
Why this matters
An unattended screen or check-in tablet should do one job. The waiting-room display needs queue numbers but no charts. The kiosk needs to match an appointment and check the patient in, but it should not let anyone search the register or browse the day's appointment list.
Before you start
- Facility Admin:
admin@demo-clinic.test/DemoAdmin-2026. - Front Desk:
frontdesk@demo-clinic.test/Verabase-2026. - A scheduled appointment for today, with the patient's name and date of birth as booked.
Steps
1. Give the lobby screen its own role — as Facility Admin
In Administration → Roles, create a Lobby Display role. Search the permission catalog for the waiting-room task and select only Display the waiting room queue. Save the role. It has no patient-search, chart, or staff permissions.
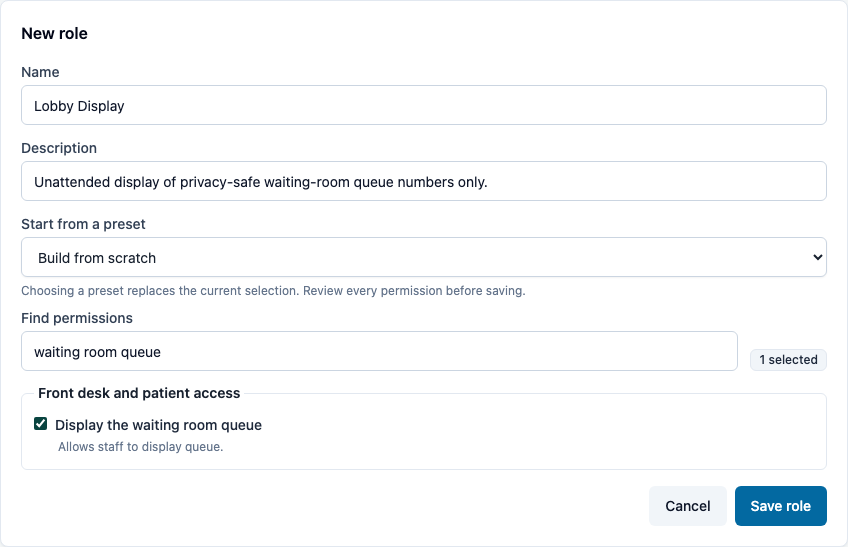
In Administration → Staff, create a named account for the lobby screen and assign only Lobby Display. Use a unique password and keep the account details with the facility's device setup records.
Create a second account for the check-in tablet and assign the built-in Patient Kiosk role. Do not add ordinary staff roles to either unattended device account.
2. Check the waiting-room screen — as the lobby display account
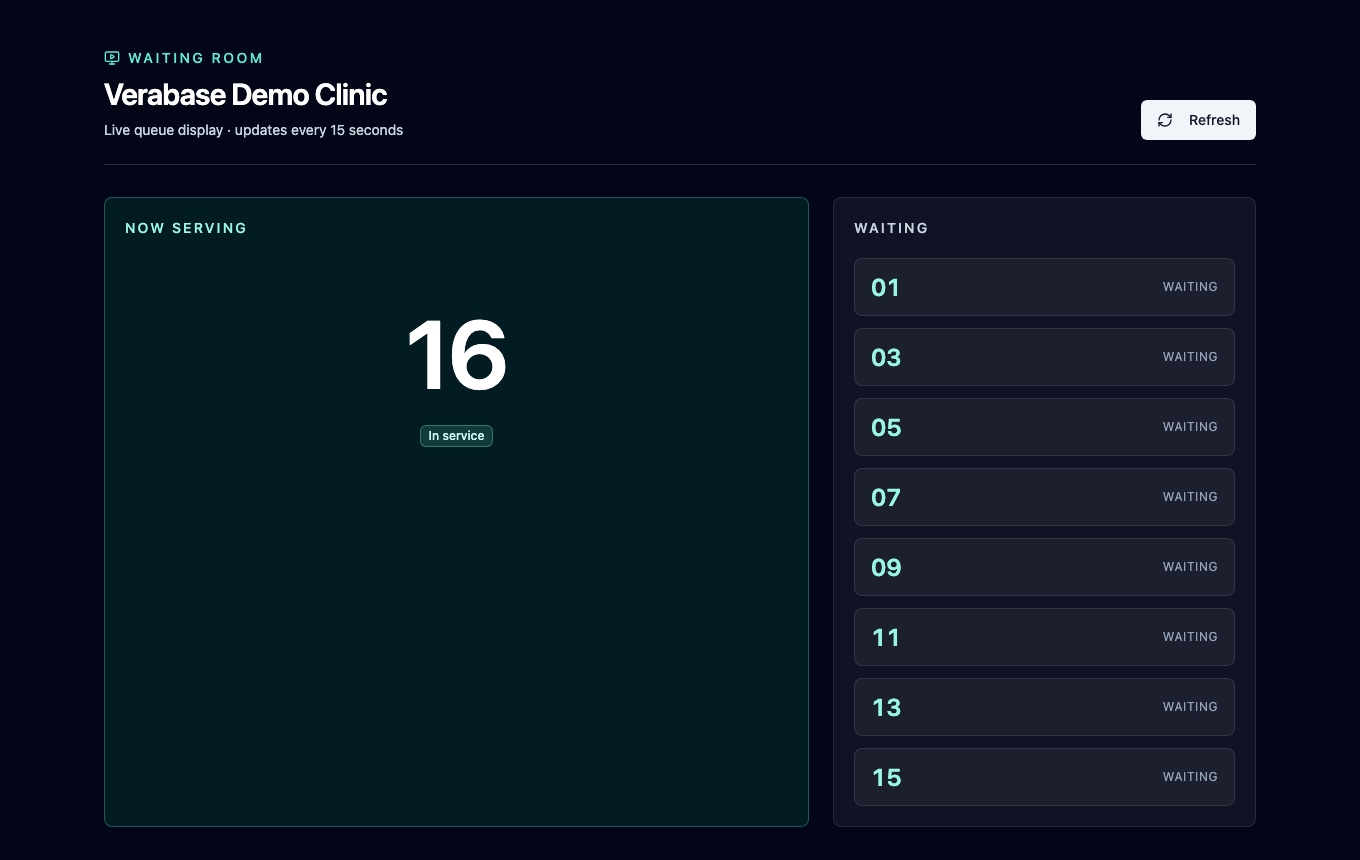
Sign in on the lobby monitor. It opens directly to Waiting room. The screen shows the currently called ticket and up to eight waiting ticket numbers. When the queue has more than eight people waiting, newer tickets may not appear until the queue advances. It has no patient names, chart links, staff navigation or exit button. The board refreshes every 15 seconds; Refresh can update it sooner.
3. Check in at the tablet — as the Patient Kiosk account
Sign in on the check-in tablet. The kiosk asks for the same full name and date of birth used to book the appointment. It never lists appointments. If the details do not match a check-in appointment, the message is the same for a missing or mismatched booking: ask reception for help.
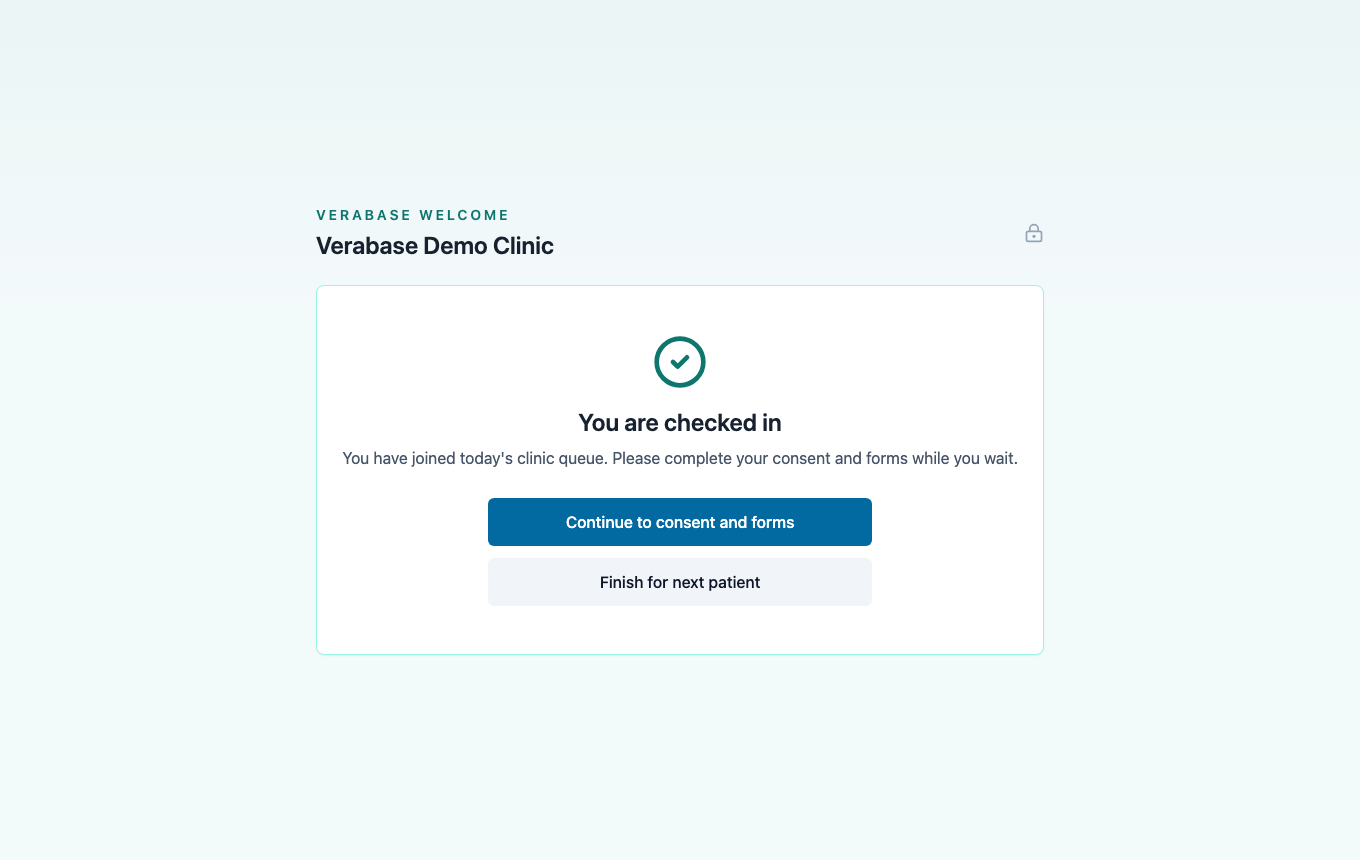
When the details match, the kiosk confirms the patient joined today's clinic queue and offers Continue to consent and forms. The confirmation does not repeat the patient's name on a shared screen.
4. Confirm the arrival and check the lobby screen
As Front Desk, confirm the appointment now reads Checked in in the schedule. Then sign back in to the lobby display account and choose Refresh. The display remains limited to ticket numbers, even if the queue is full and the new ticket is not among the eight shown.

What Verabase will refuse, and why
| You try | Verabase says | What to do |
|---|---|---|
| Open the patient directory from the kiosk account | The kiosk returns to its check-in screen | Use the Front Desk account for patient search |
| Enter a name or date of birth that does not match a check-in appointment | We could not match those details to an appointment available for check-in. Please ask reception for help. | Check the booking details privately with Front Desk |
| Open staff navigation from the kiosk or lobby display account | No staff exit or chart route is offered | Sign in with a staff account at a staff workstation |
You're done when…
- [ ] The lobby display account has only the waiting-room display permission.
- [ ] The Patient Kiosk account is separate from staff accounts and lands on check-in.
- [ ] Wrong appointment details reveal no patient or appointment list.
- [ ] Correct details confirm the arrival joined today's clinic queue and Front Desk sees the appointment as checked in.
- [ ] The lobby monitor shows ticket numbers only, up to eight at a time.
Practice task
On a fresh demo, create a display-only role, assign it to a lobby account, and check in a scheduled patient from the kiosk. Check: the kiosk confirms success, Front Desk sees the checked-in appointment, and the waiting-room screen shows no patient names.
Related journeys
FAC-OPD-01 Outpatient visit · FAC-OPD-02 Appointments · IMP-02 Staff and roles