Appearance
FAC-LAB-02 · The lab bench beyond routine: a rejected specimen, a reference lab, an analyser result
Most orders run straight through the bench (FAC-OPD-01 step 4). This journey covers the other cases. A specimen arrives that can't be tested. A test the lab doesn't run goes to a reference laboratory. A result comes straight from an analyser. Every result, wherever it came from, is checked by a supervisor before it's final.
Why this matters
A rejected specimen that nobody hears about is a test that never happens: the doctor assumes it's in progress. A send-out without a record gets lost between labs. A result keyed by hand from an analyser printout invites transcription errors.
Before you start
- Lab technician:
lab@demo-clinic.test. Lab supervisor:labsup@demo-clinic.test. Doctor:dr.okafor@demo-clinic.test. AllVerabase-2026. - The demo has orders at every stage on Diagnostics → Lab → Order queue. Filter the queue by status: Ordered, Sample collected, Awaiting result, At reference lab, Completed, Rejected.
Steps
1. Reject a specimen on arrival — as Lab technician
Filter Sample collected, choose Select on the order, and look at the specimen before you choose Received in lab. If it can't be tested (haemolysed, clotted, unlabelled, wrong tube, too little), write what's wrong under Reject the specimen and choose Reject specimen. The button stays disabled until there's a reason. You can also reject after receiving it, before accessioning.
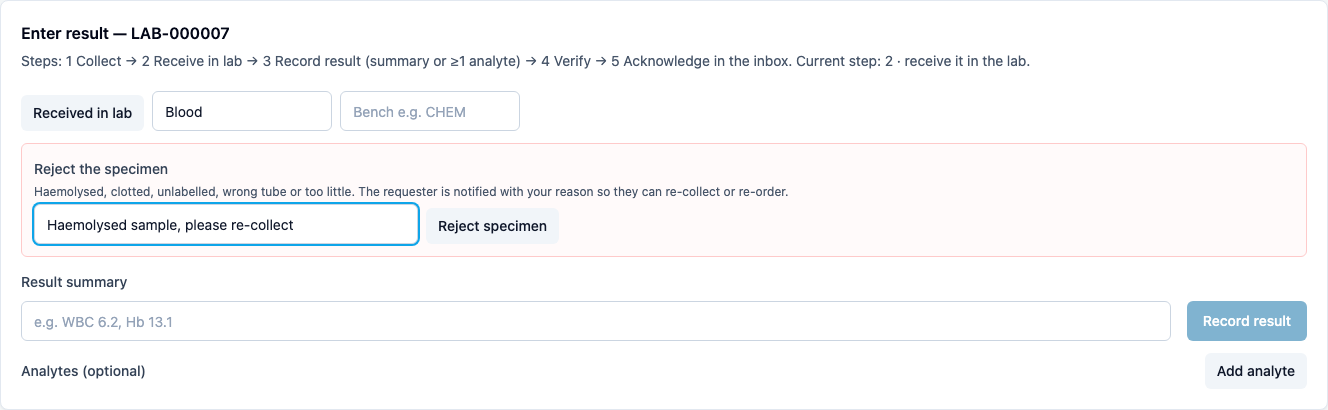
The order moves to Rejected.
2. The doctor is told why — as Doctor
The requesting doctor gets a notification, in Results inbox → Work queue and on the bell, naming the test and the patient, with your reason:

It opens the patient's chart at Labs, where the rejected order shows the reason. Re-collect, or re-order the test if it's still needed.

3. Send a test to a reference laboratory — as Lab technician
For a test your lab doesn't run, select the order (Awaiting result). In Reference laboratory, enter the External laboratory, check Tests sent (it starts as the ordered test), and set the Expected return. Choose Send to reference lab.

The order moves to At reference lab, and the card shows where it went and when. When the report comes back, type or paste it into Result returned by reference lab and choose Record returned result:
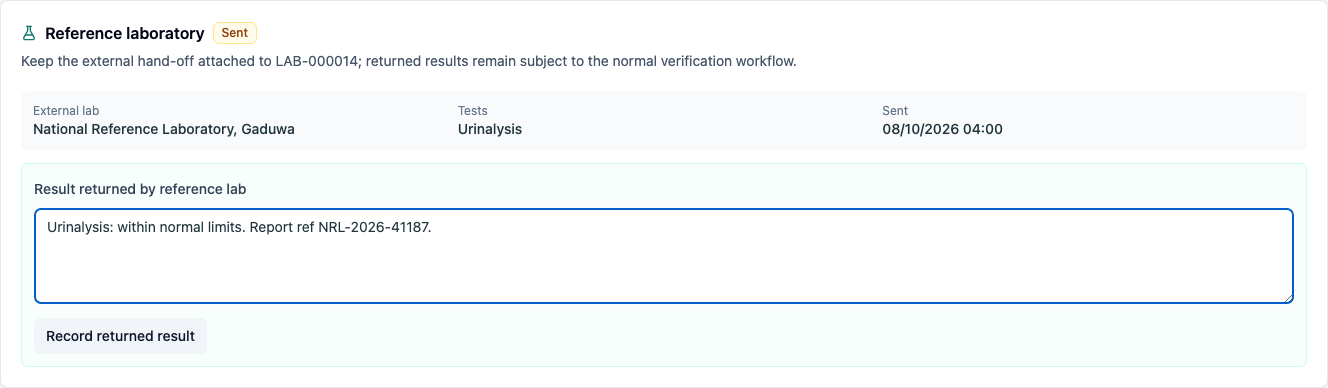
The order is Completed, and the result waits for verification like any other.
4. Import an analyser result — as Lab technician
Where an analyser isn't connected directly, its result message can be pasted in. Select the order (it must be Awaiting result, i.e. received in the lab). In Analyser import, choose the Protocol (HL7 v2 or ASTM), enter the instrument's Message ID, paste the Raw message, and choose Import analyser result.
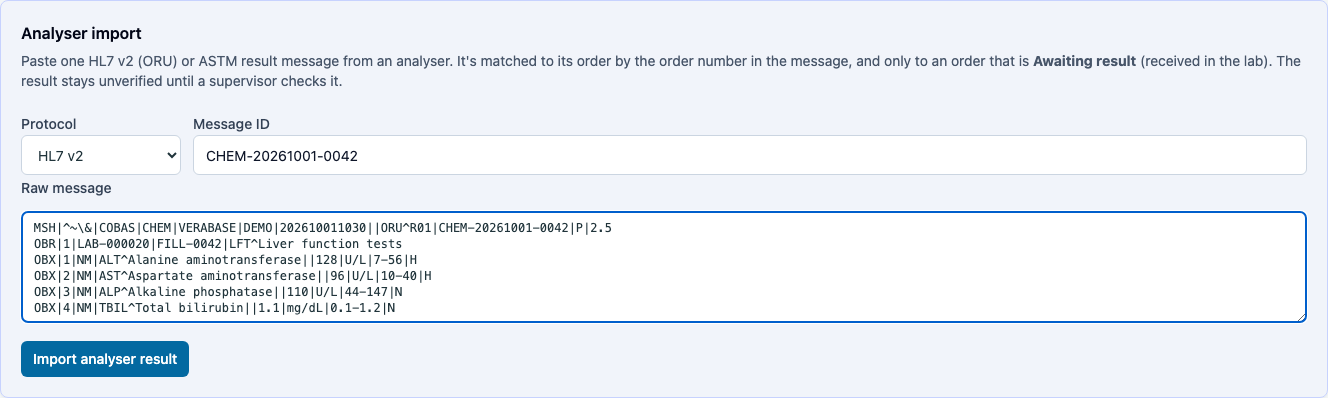
The message is matched to the order by the order number it carries. Each value arrives with its unit, reference range and flag, with nothing retyped. The same message ID sent twice is only recorded once.
5. Verify — as Lab supervisor
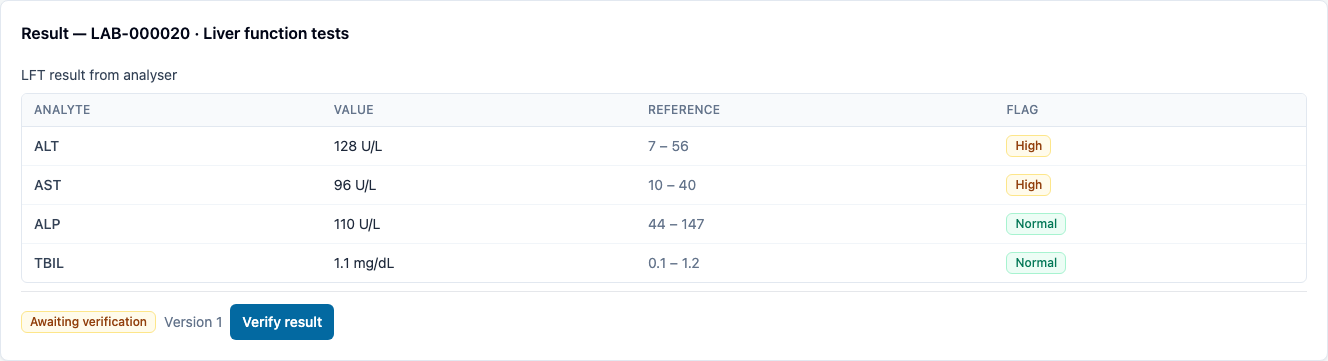
Filter Completed and select the order. Check the values against the flags and the patient, then choose Verify result. Until then it shows Awaiting verification.
What Verabase will refuse and why
| You try to… | Verabase says | Why |
|---|---|---|
| Reject without a reason | Reject specimen stays disabled | The requester needs to know what to fix |
You're done when…
- [ ] Every rejected specimen has a reason the doctor can act on.
- [ ] Every send-out has a laboratory and an expected return, and is chased when late.
- [ ] Every result, in-house, analyser or reference, is verified by a supervisor.
Practice task
Reject one collected specimen with a reason, send one test to a reference lab, then record its returned result. Check: the trainer sees the rejection on the doctor's inbox, and the returned result awaiting verification.
Related journeys
FAC-OPD-01 Outpatient visit (routine lab path) · FAC-RAD-01 Imaging